Grip, Mark, Cut, Repeat: Everyday Tool Moves That Make DIY Smoother
If you’ve ever started a “simple” home project and ended up knee‑deep in chaos, you’re not alone. The secret isn’t always buying more tools—it’s learning to use the ones you already have in smarter ways. With a few practical tweaks in how you grip, mark, cut, measure, and store your tools, your DIY projects get faster, cleaner, and way less frustrating.
This guide walks through five real‑world, tool-focused moves you can start using on your next home improvement project—even if your toolbox is basically a hammer, a drill, and a dream.
Step 1: Lock In a Safer, Stronger Grip on Hand Tools
A lot of DIY mistakes start with one thing: bad grip. Slipping screwdrivers, wobbly hammers, and wandering saws all come from tools not being held or supported properly. You don’t need fancy gear to fix this—just a few habits.
First, match the tool to the job and material. Use a stubby screwdriver in tight spots, a longer one where you need leverage, and the correct bit type (Phillips vs. flat vs. Torx). A mismatched bit chews up screws and your patience. Keep the handle lined up with your forearm so you’re pushing in a straight line, not at an angle.
When using a hammer, choke up on the handle for control when starting a nail, then slide your hand toward the end for more power once it’s set. Let the hammer’s weight do the work—swing from your elbow and shoulder, not just your wrist. For hand saws or pull saws, clamp or firmly brace the workpiece so the tool doesn’t fight you. Start with light, short strokes to create a groove; then lengthen the stroke as the cut establishes.
If your tools are slippery, add grip: wrap handles with athletic tape or use rubber tool grips. Work gloves with textured palms can also reduce fatigue and improve control, especially with metal tools. Good grip equals cleaner work and fewer “how did that happen?” dents in your wall.
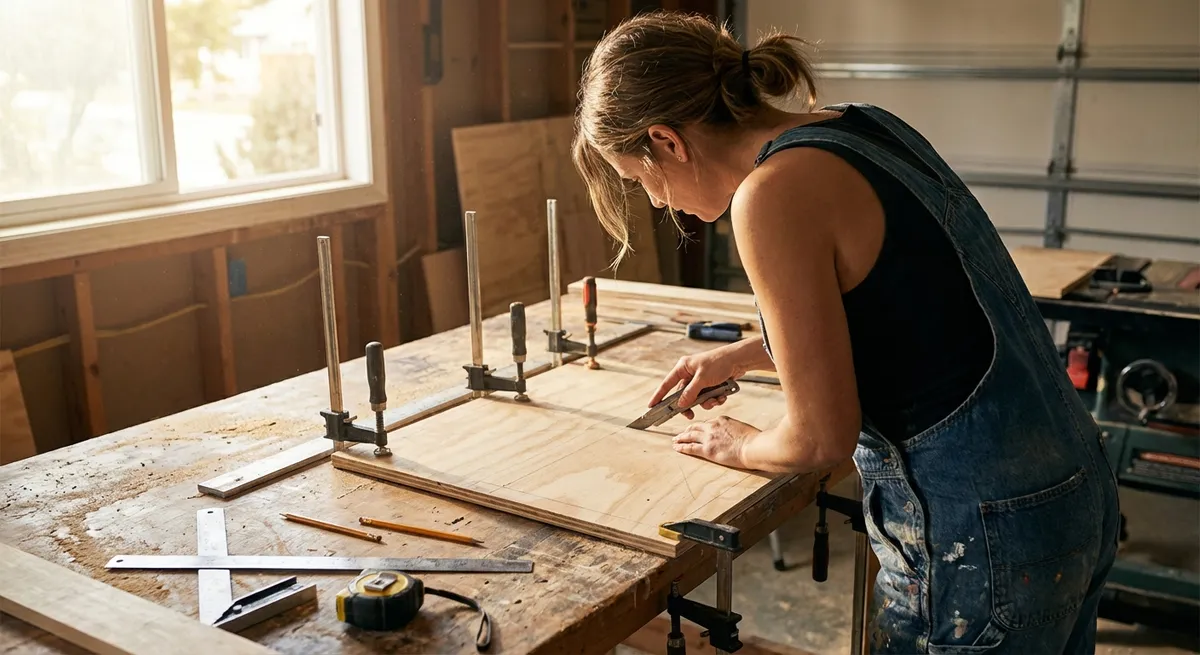
Step 2: Mark Like a Pro So Cuts and Holes Land Exactly Where You Want
Accurate marking is the difference between “fits on the first try” and “well… that’s what caulk is for.” Instead of eyeballing everything, build a simple marking routine into every project.
For straight lines on wood, drywall, or trim, use a pencil and a straightedge (a level works great). Mark your measurement using a small “V” shape—putting the tip of the V at the exact point you’re measuring—so you know exactly where the line should go. When cutting boards, put the “X” on the waste side so you don’t accidentally trim the wrong part.
Use a combination square or speed square for quick 90° and 45° marks. These also help you check if something is truly square before screwing or nailing it in place. For repeated cuts—like multiple shelves or identical trim pieces—make one accurate layout piece, then trace that onto the others. That saves time and keeps everything consistent.
When drilling, use a center punch or even a nail to create a tiny starter dimple. This keeps the drill bit from sliding across metal, wood, or plastic. If you need to drill multiple holes at the same depth (such as for anchors or shelf pins), wrap painter’s tape around the bit at the desired depth as a visual stop line. You’ll stop right on target without fancy jigs.
Step 3: Control Your Cuts for Cleaner Edges and Less Tear-Out
Power tools get a lot of attention, but the real trick is controlling the cut, not just powering through it. Whether you’re using a circular saw, jigsaw, or utility knife, a few small changes can dramatically clean up your edges.
With a circular saw, cut with the good side of the board facing down if you’re using a standard blade—the underside usually tears less. Clamp a straight board to your workpiece and run the saw’s shoe along it as a guide when cutting shelves or plywood. That DIY guide turns wavy “oops” cuts into straight, repeatable lines.
For jigsaws, use the right blade: fine-tooth blades for cleaner cuts in wood or laminate, coarse blades for faster but rougher cuts, and metal blades for pipe or brackets. Don’t force the saw; let the blade do the work and follow your line steadily. If you’re cutting out a shape in a cabinet or wall, drill a starter hole big enough for the blade to fit into, then cut from there.
With a utility knife, make several light passes instead of one deep slice. This is especially important on drywall, vinyl flooring, or rigid foam. Use a metal straightedge whenever possible and keep your off-hand safely out of the cut line. A dull blade is more dangerous than a sharp one, so snap off or replace blades regularly—your cuts will be cleaner and you’ll use less force.
Before any cut, double‑check: “good side up or down?”; “waste side marked?”; “hands clear?” These few seconds can save you from redoing entire pieces.
Step 4: Measure and Level in a Way That Actually Matches the Real World
We like to imagine homes are perfectly square and level. They usually aren’t. Your tape measure and level are still your best friends, but you need to use them with real‑world expectations.
When measuring, always hook the tape on the same reference edge. If you’re installing multiple shelves or hanging a gallery wall, pick one baseline (like the floor or a chair rail) and measure everything off that, not off random spots. Read the tape at eye level and write measurements down—don’t trust your memory mid‑project.
Use a level not only to level shelves but to transfer straight lines across a wall. Mark a level line at your desired height, then work from that line instead of relying on the floor or ceiling, which might not be true. For long runs (like a kitchen backsplash), level a straight board or ledger temporarily and use it as a reference support.
When hanging something heavy into drywall, use a stud finder and confirm by tapping and driving a small test nail. If you can’t hit a stud, use the proper heavy‑duty wall anchors rated for the load. Check the packaging so you’re not asking a tiny plastic anchor to hold a loaded bookcase.
Accept that sometimes “looks level” is what matters most, especially in older houses. If your house settles or your floor is slightly off, you may need to split the difference between perfectly level and visually straight. Use both your level and your eyes—if the bubble is perfect but it *looks* crooked next to a slanted ceiling, adjust until it feels right.
Step 5: Set Up a Simple, Smart Tool Layout So Projects Go Faster
You don’t need a full workshop to work efficiently; you just need your tools organized in a way that supports how you move through a project. Think “quick grab, quick return,” not “perfect Pinterest wall.”
Start with a small core kit you keep together in a bag, bucket, or toolbox: tape measure, utility knife, multi‑bit screwdriver, hammer, adjustable wrench, pliers, small level, and painter’s tape. This becomes your “roaming toolkit” that follows you from room to room. Add a drill and a few common bits (pilot, countersink, and a set of screwdriver bits) in the same area or case.
Use simple dividers, zip pouches, or small containers to separate screws, nails, anchors, and drill bits by type and size. Label them in plain language you’ll actually remember, like “Drywall anchors,” “Wood screws – long,” or “Cabinet hardware.” The goal is to be able to reach blindly into a bag and still grab the right thing.
Before a project, stage your tools near where you’ll work. Lay out what you know you’ll need on a small table, workbench, or even a piece of scrap plywood laid across two chairs. Keep a trash bag or bucket nearby for offcuts and packaging—that alone cuts cleanup time dramatically.
After each project, do a 5‑minute reset: return tools to their “home,” toss broken bits, and note any missing or worn‑out items. That tiny habit means your next DIY session starts with a ready‑to‑go kit instead of a scavenger hunt.
Conclusion
You don’t have to be “naturally handy” to pull off solid DIY projects—you just need a few tool habits that stack the odds in your favor. Grip with control instead of brute force, mark and measure like you plan to get it right the first time, guide your cuts instead of wrestling them, and keep your tools where you can actually find them.
Start with one or two of these moves on your next project—a straighter cut here, a better anchor there—and you’ll feel the difference. Over time, these small tool tips add up to cleaner results, fewer do‑overs, and a home that shows off what you can actually do with your own two hands.
Sources
- [U.S. Consumer Product Safety Commission – Power Tool Safety Tips](https://www.cpsc.gov/safety-education/safety-guides/tools/power-tool-safety-tips) - Guidance on safe handling practices that inform better grip, cutting, and drilling habits
- [OSHA – Hand and Power Tools](https://www.osha.gov/hand-power-tools) - Official recommendations on proper tool use, maintenance, and setup
- [Family Handyman – Essential Measuring Tips for DIYers](https://www.familyhandyman.com/project/measuring-tips-and-techniques/) - Practical measuring and marking techniques that align with the tips in this article
- [This Old House – How to Use a Circular Saw](https://www.thisoldhouse.com/tools/21017783/how-to-use-a-circular-saw) - Detailed guidance on controlling cuts and using guides effectively
- [Fine Homebuilding – Basics of Using Levels and Layout Tools](https://www.finehomebuilding.com/project-guides/tools-materials/the-basics-levels-layout-tools) - Explains best practices for leveling, layout, and accurate marking